| |
|
David
Wyand 's Looking Glass for the Torque Engine
|
|
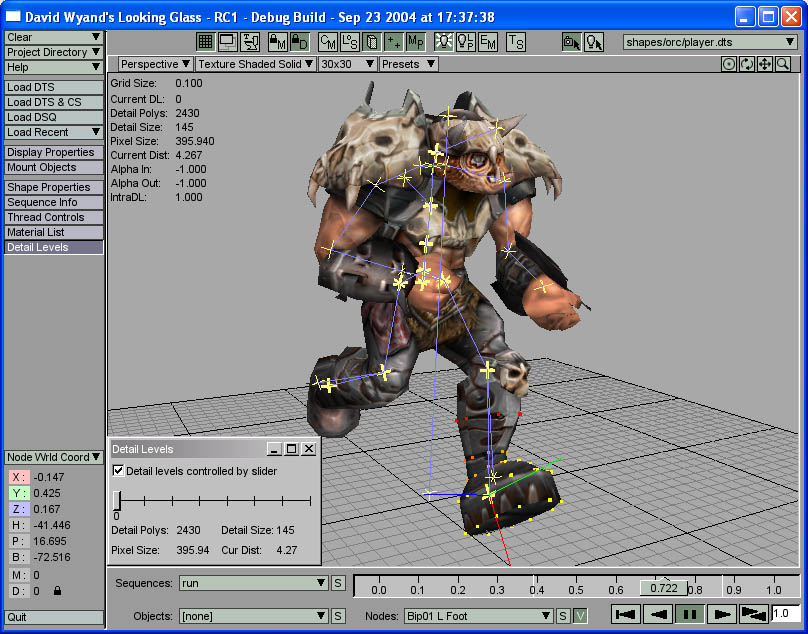
The TGE Orc player model has been loaded and the BIP01
L Foot node has been selected by the user. With a selected
node, Looking Glass draws the node's axis as well as displays
either its world or local position and rotation (user selectable)
to the left of the view window. Also with a node selected,
the vertices that are controlled by the node are highlighted.
A yellow vertex is completely controlled by the node while
a red one has very little influence (the colours are user
definable).
The run animation sequence has been selected and is
shown three quarters of the way through using the animation
position slider. The nodes and their parental links are shown
and animate along with the object's mesh. The user also has
the Detail Levels window open with the first level of detail
selected. The user toggled HUD also shows the various LOD
statistics.
|
 |
| |
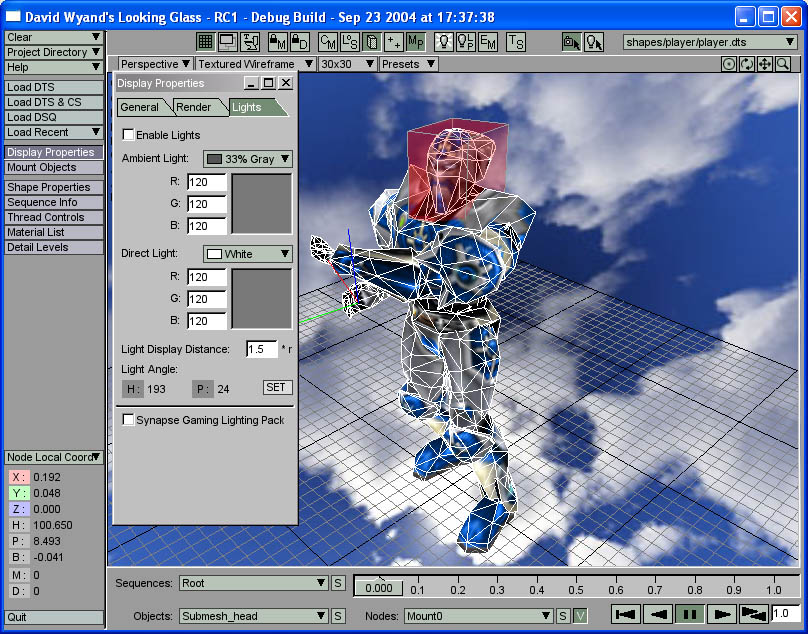
| The original Torque Guy has been loaded into a separate layer
and is being rendered with a white wireframe over the texture.
The head object has been selected causing a translucent bounding
box to be drawn. Lights have been disabled forcing the object
to be shown with 100% ambient light. The solid background colour
has been replaced with a user selected image. The drawing of
the nodes and node links has been disabled while the mount0
node has been selected causing its local coordinates and axis
to be displayed. |
|
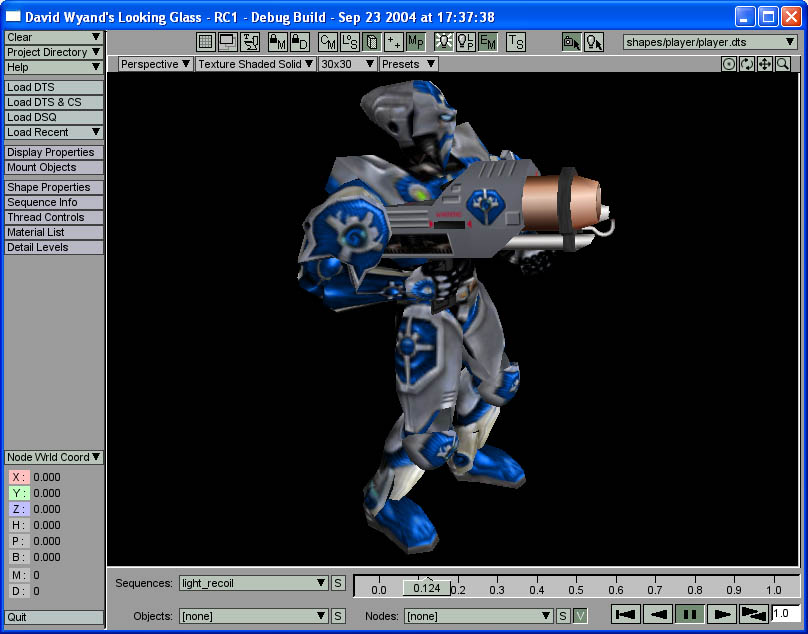
| The user has chosen a black background and turned off the
grid. Environmental mapping has been enabled with a user selected
bitmap. A weapon (that was loaded into another layer) has been
mounted to the player.dts's hand (mount0, but it could
have been any node). |
 |
| |
|
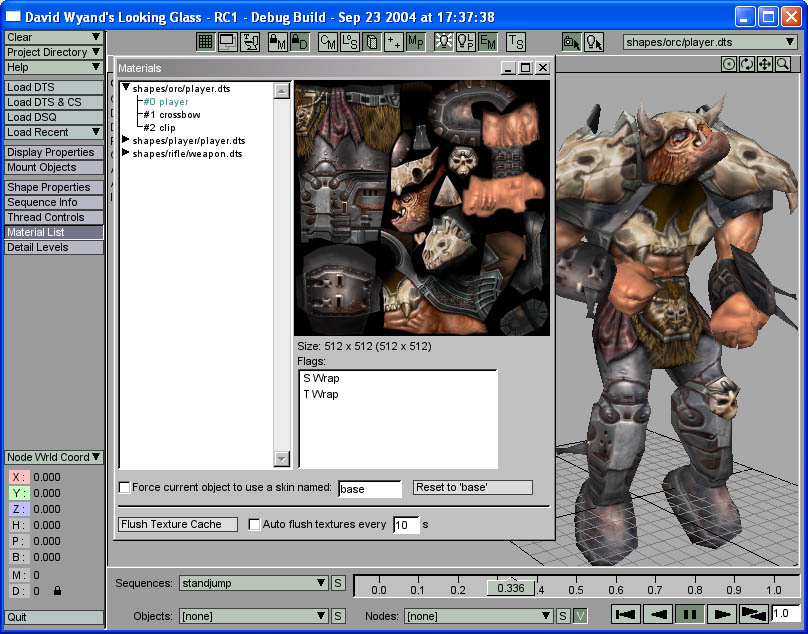
The Material List window has been opened showing all of the
DTS materials for the current object. The material named player
is 512x512 pixels and has the S Wrap and T Wrap flags turned
on in the DTS file. If this file were in the standard TGE
skin format (base.player.png for example) then it could be
changed using the skinning controls at the bottom of the window.
If the Flush Texture Cache button were clicked, all
bitmaps would be flushed and reloaded (also accessible by
pressing the 't' key). The user may also elect to reload all
textures on a timed basis. This is useful when creating textures
in a paint program, allowing the user to periodically save
their texture and see the results on their model.
|
 |
| |
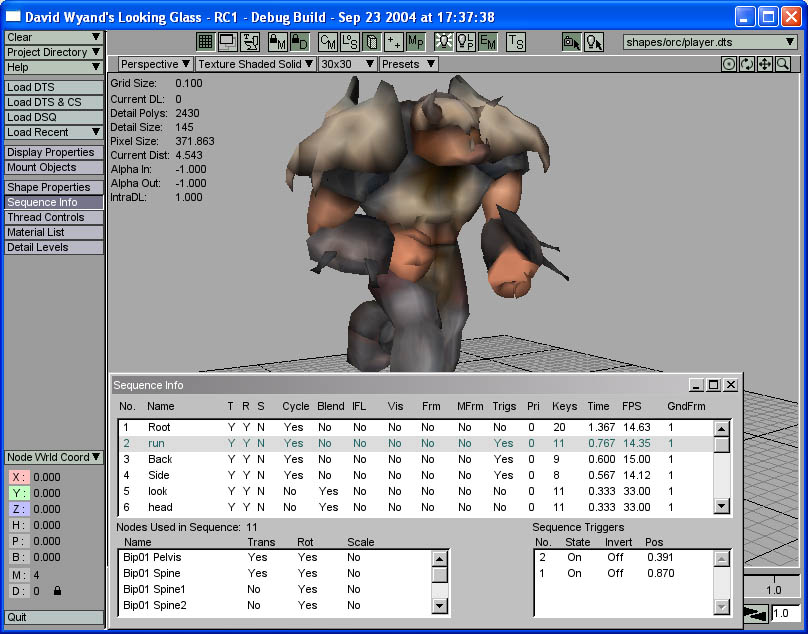
| The current object is being forced to display the fourth mip
map level. All mip map levels may be inspected while the object
is viewed full size, which is useful for checking for visible
seams. The Sequence List window is open showing a number of
attributes for the loaded animation sequences, including which
nodes take part in the animation, and any defined triggers. |
 |
| |
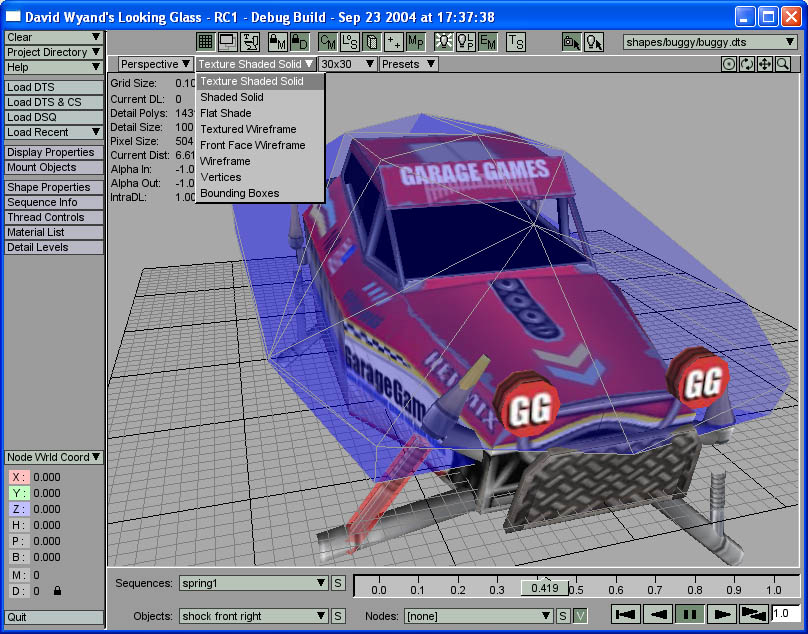
| The buggy.dts object's collision mesh is displayed over the
object. The front right shock object has been selected causing
its bounding box to be rendered. The main light has been moved
over and slightly in front of the buggy by holding down the
'l' key and moving the mouse. |
 |
| |
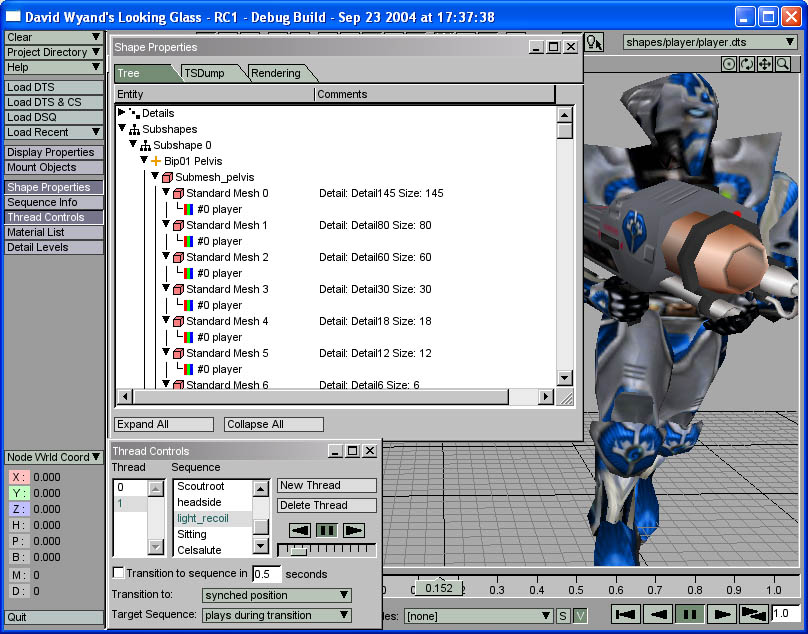
| The Shape Properties window is open showing the structure
of the current object. Nodes, their meshes and the materials
used by those meshes are shown. The Thread Controls window is
also open, allowing the user to have multiple animation sequences
playing at once for the current object. This is useful for testing
out blended sequences. |
 |
| |
|
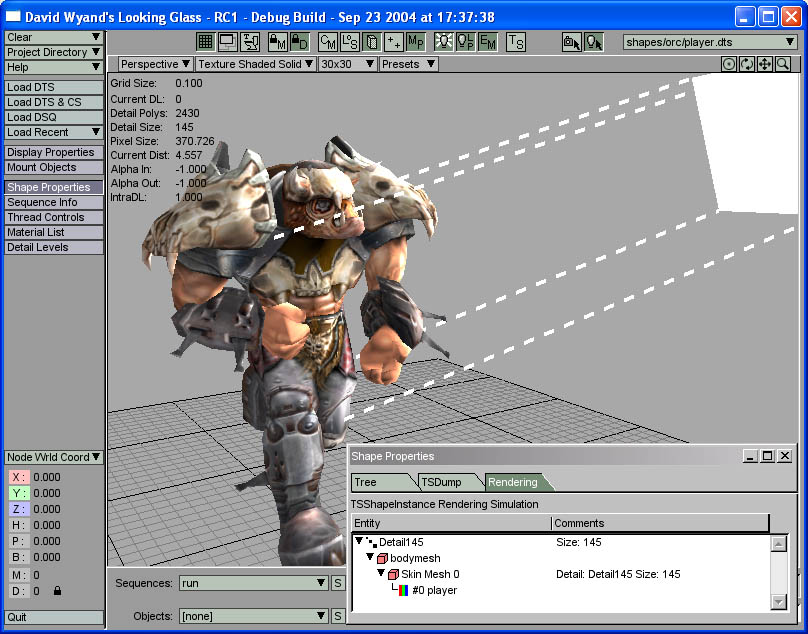
The Shape Properties window is open this time showing the
Rendering tab. This shows the user how the current object
and detail are rendered, including the order in which the
objects and meshes are drawn. In this case, the detail level
at 145 pixels is being drawn, which contains the bodymesh
object. This object has a skin-type mesh (other possible meshes
are standard and sorted) with a single material.
The user has also activated the Synapse Gaming Lighting Pack
and is in the process of positioning the overexposed light
source.
|
 |
| |